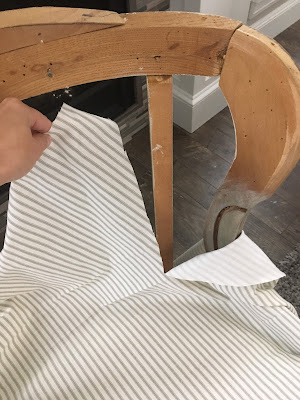
Deconstructed Upholstery
I got these chairs a while ago from a friend. They had belonged to his parents, and they were lovely. Just old. I have had them in my basement for well over a year, and I had wanted to send them to someone else to be upholstered.
Well, that can get expensive, and the only way to improve my own upholstery skills is to practice, right? So I went for it! I decided on the deconstructed look for two reasons. First, because I like it, and second, because it's less work. Win, win, right?
Here is what they looked like before. For some reason I can only find a photo of one. You can't see it well, but the wood was pretty beat up.
I actually started tearing the old upholstery off at one time, months ago, and then walked away from them only about 20% finished, and didn't start again for a LONG time. In my opinion, tearing down upholstery is one of the worst jobs on the planet! Thank goodness when I decided to go at it again, my husband was willing to help me. Even so, the two of us probably spent a good four hours tearing of fabric, and pulling out staples. So here they are, finally all ready to get started. Luckily, the foam and padding was in good condition, and didn't need to be replaced.
The next step was painting. I really wanted to keep some wood grain, but the wood wasn't in good enough condition to fully strip and stain. Especially the parts that used to be covered with upholstery, that would now be exposed. So, I did some really thin paint layering, and glazing. I used some washing technique, some dry brushing technique, and also some distressing, and was really pleased with the finish. You can still see some wood grains, and it looks perfect for a deconstructed chair. I didn't actually plan to blog about this originally, so my photos are not the best, but here are the photos I took for my social media.
At this point I had to wait for my fabric and coffee sacks to be delivered, which was perfect, because it gave my finish a few days to cure before I stared upholstering. I ordered my coffee sacks from Amazon, in a variety 10 pack, and I shared the variety in a video on my instagram. If you aren't already following me there, go check it out! @sealedwithloveonsundaydrive
Once I got my fabric, I got right to work. I started with the seats.
The seats were the easiest part. At that point I forgot to take pictures until it was finished. I'm Sorry! I wish I was better about that, but I was in the zone and working toward the finish line. I can tell you that I did the coffee sacks next, and then I put the padding back on the back, and did the back. I used plain canvas for the back. Lastly, I glued thick, jute trim to finish it all off, and I love the way they turned out!
You might be noticing my stunning staging wall! That was another recent project, and hopefully I will be blogging about it soon. Don't you love it?!


Download 16,000 Woodworking Plans & Projects
ReplyDeletehttps://www.facebook.com/Woodworking-Projects-and-Plans-729966907189601/
Woodworking guide offers anyone of any skill level the ability to build amazing projects. The guide is extra helpful because it offers more detailed explanations, videos and blueprints then your typical woodworker magazine.